
I spent many happy hours yesterday making hand-rolled beeswax candles. I taught myself through trial and error and learned to make them years ago. I even went into business making them using natural golden, honey scented wax sheets, made a natural wrap of corrugated brown paper, tied them with raffia and stuck dried "Pearly Everlasting" flowers in the tie and sold them in the gallery at Vista House for years. :-) I thought I'd show you what I learned so you can make some for yourself or for gifts.
I used to buy my wax sheets through Ruhl Bee Co. but when I went to find their website, they'd gone out of business. :-( The people who bought their company only carry the natural golden color sheets. SO.. I went to Amazon and I found these - you get 10 sheets of any color you want. I ordered a package of bright red and a nice green.

The photo shows the red pretty well but it's actually a bit darker and the green is darker too.

You'll need: A craft mat or cutting board to work on, a utility knife or box cutter, ruler and a t-square, scissors to cut the wick. The sheets are 16 1/2 inches by 8 inches wide. First up you measure to 8 1/4 inches and cut the sheet in exactly half. I use a t-square when cutting so the edge is straight. NOTE: Try to have your wax at room temp, cold wax is much harder to manipulate.

I used to fold up the edge to insert the wick and this time came up with a clever idea of using the cardboard inside the box to use to turn the first fold up, this makes it more even. You only want to fold up a bit because the first roll makes or breaks the tightness of the finished candle.

Next you lay the wick on the sheet and cut it with 1/2 extra to stick up over the top to light. You can then use the first wick and use it as a measure to cut the next wicks ahead of rolling the next candles.
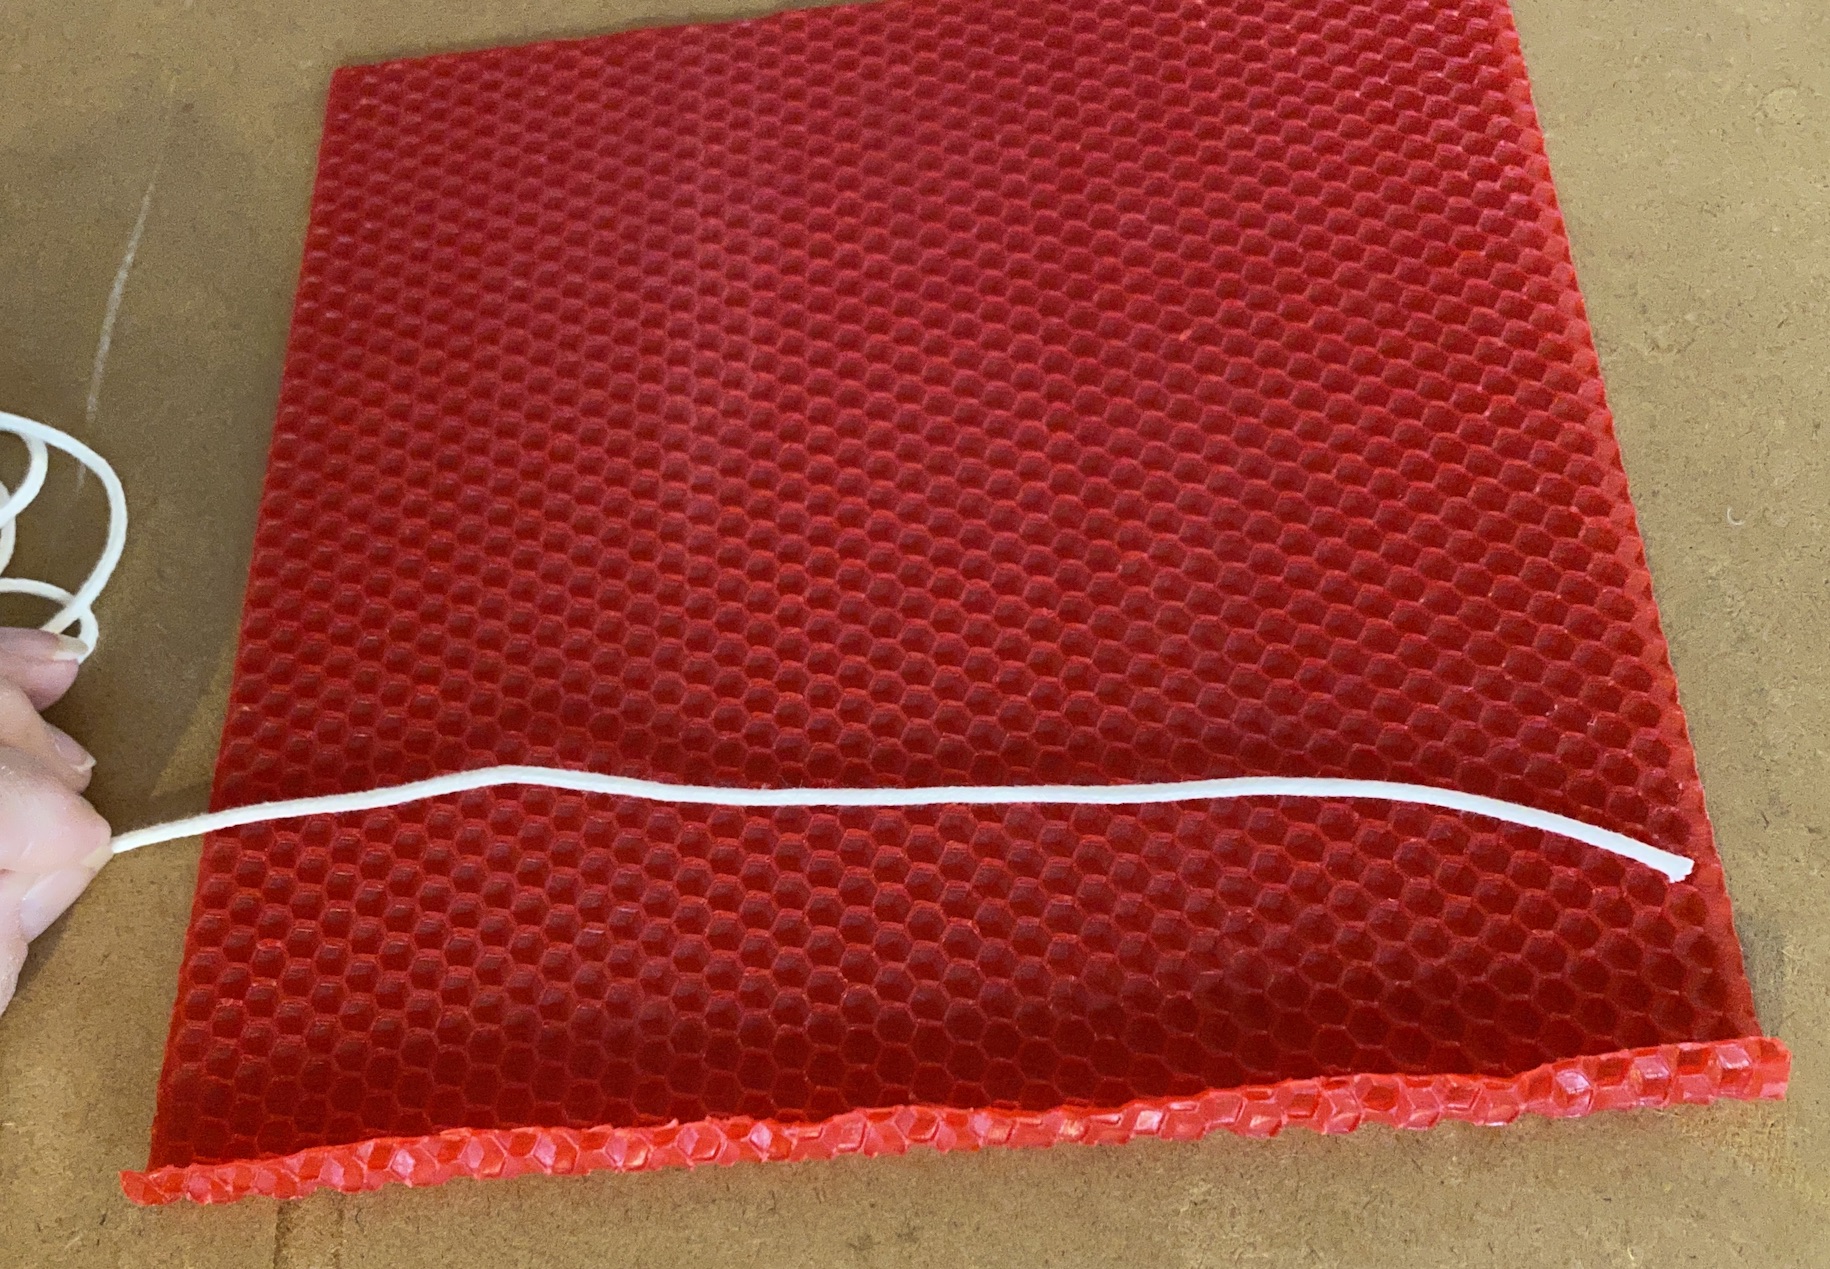
I put the end of the wick into the rolled edge and press it down and around the wick to hold it into place while I roll the rest of the wax over the wick and tuck it so it's round, not flat when I begin to roll.

Then you make the first roll.. it's very important that it's tight and round. You also must not do it so tight that you mash it. But if it's too loose it won't be a well-made candle. You'll learn as you go what works.

This is what it should look like when you're ready to roll...

My rolling technique is to use both hands, even pressure on the whole length of the candle, roll.. roll..

While rolling you need to make sure the edges are even, if you are not keeping even pressure it can start going askew.. if that happens you can unroll it carefully until it's to the point where it's even and then continue.

Roll.. check to see it's even on each end.. roll..

When it's all rolled up.. take your thumb and gently press the last edge to the candle. Not too hard or you'll squish it. :-)

This is what it should look like on the end when done. Tight but not crushed.

Ta-dah.. one pair done.

Then a green pair.

The beauty of these candles is they are a bit sticky so they stay in candleholders well. Plus if the holder opening is small you can press the base of the candle narrower, carefully, and it should fit any holder. Also - the finished candle is the perfect size for most candlesticks.

A red pair. And they smell divine, like honey. Some hints for successful burning of these - never burn them in a draft as they will drip, don't put them under a ceiling fan, open door or window. Keep the wick trimmed to 1/4 inch for even burning. Never leave a burning candle unattended. Keep away from pets and children. Blow the candle out if it's smoking or the flame becomes too high. When it cools, trim the wick and re-light.

OK, have a wonderful week my friends!
((hugs)), Teresa :-)
Thanks so much for a beautiful tutorial post!! We never got together to roll candles before Covid, so I especially appreciate your wonderful typed and visual instruction. The header photo is lovely! ((hugs))
ReplyDeleteThank you for posting this tutorial. I just rec’d some orange beeswax candles & now I only want to make my own!!
ReplyDeleteThose green and red candles are gorgeous and festive. I would like to try rolling some candles. When I attended Griefshare at a church 3 years ago, one of the helpers gave each attendee a hand rolled beeswax candle, to burn in memory of our loved one. I think I will light that candle this week. Wonderful new header photo of yours.
ReplyDeleteOh yes great header pic Teresa. Clear instructions on your lovely candles too. 😀😀
ReplyDeleteThat's so neat that you have such a famous barn! What a great header. Beeswax makes the best candles in my opinion. Thank you for sharing your expertise in making them.
ReplyDeleteMy children all learned to make beeswax candles when they were in the fifth grade. They went on a field trip to a homestead and they taught them there. Yours look lovely. I love your new header.
ReplyDeleteThanks for the great tutorial!
ReplyDeleteYour barn and trees are very photo-worthy indeed. I would snap them too if I lived nearby!
Happy Thanksgiving to you and your dear family.
I remember making candles like these in middle school. We also made the ones where you take a small container (like milk carton), break up ice into large chunks, put it in the container around a wick, melt candle wax (melted but not super hot) and pour over ice to fill the container. We also used sand to make molds for free form candles. Boy, a lot of candles, lol. Thanks for the memories.
ReplyDeleteVery pretty. I'm sure they sold well at the Vista house. I'm sure we can't get those beeswax sheets here, but have noticed several new local accounts that are making soy candles which is nice to see since they are much better than the regular kind. Your barn and property is definitely photo worthy. Take care.
ReplyDeleteHi Teresa !he first thing I noticed was that lovely photo of your barn and the trees. Of course I had thought you had taken it. Obviously, someone else realizes how beautiful your farm is too!
ReplyDeleteThis was an excellent tutorial for the candles. I'll have to remember it's here when I live somewhere I have more room for candles. I think yours are just beautiful. And speaking of beautiful, how do you keep your nails so pretty? Mine are a mess, but then, they always are. :-)
It was really nice to visit with you and see glimpses of your lovely dining room. I remember so well the fun visits to your home. Hello to Dayle and give Mocha a kiss for me.
Blessings and love,
Betsy
Great candles and thanks for the tips. Real beeswax candles are much nicer than the synthetic variety. There is no end to your talents :). B x
ReplyDeleteWhat a beautiful job you've made of them. I suspect it takes lots of practice! But it's so nice to have candles made from natural materials. Love the new photos, the trees are absolutely magnificent. CJ xx
ReplyDeleteYour candles are so pretty and really go well with the green candle holders. I bet you were surprised and pleased to find the picture of your barn on that local area's facebook page. It's a very nice picture of your barn, especially with the fall leaves still on the trees.
ReplyDeleteYou are so crafty Teresa!! That is a lovely header picture you are showing. Beautiful property you have.
ReplyDeleteWhat a lovely idea
ReplyDeleteTeresa, You inspire me! There is nothing you cannot do! Love your house, decor and love the neighbor acknowledgement
ReplyDeleteThat is is just tops Teresa!! I have been looking at video clips on how to make candles for awhile now and it all sounds complicated which was a bit off putting! Your tutorial on how to roll candles makes it look so easy and your instructions are very clear...perfect!! I have already been googling to see if I can purchase the sheets here in Spain and ....yes.....I can... fabulous!! Beautiful header photograph! keep well Amanda x
ReplyDeleteMaravilhosas! Amei as velas!
ReplyDeleteWonderful! I loved the candles!
DeleteWhat a wonderful tutorial, they would indeed make some wonderful gifts.
ReplyDeleteThis is sooo cool I am visiting from Amanda's page I have never seen anything like this thank you Kathy
ReplyDeleteThank you for sharing this how to post. I found you via Kathy. I also added this post to the "How To" tab on my blog, so I can find it again.
ReplyDelete